On Altee, there is an option that allows you to log your employees’ worked hours. This option facilitates real-time hour tracking, improving the accuracy and reliability of total work hour calculations.
Steps to Follow:
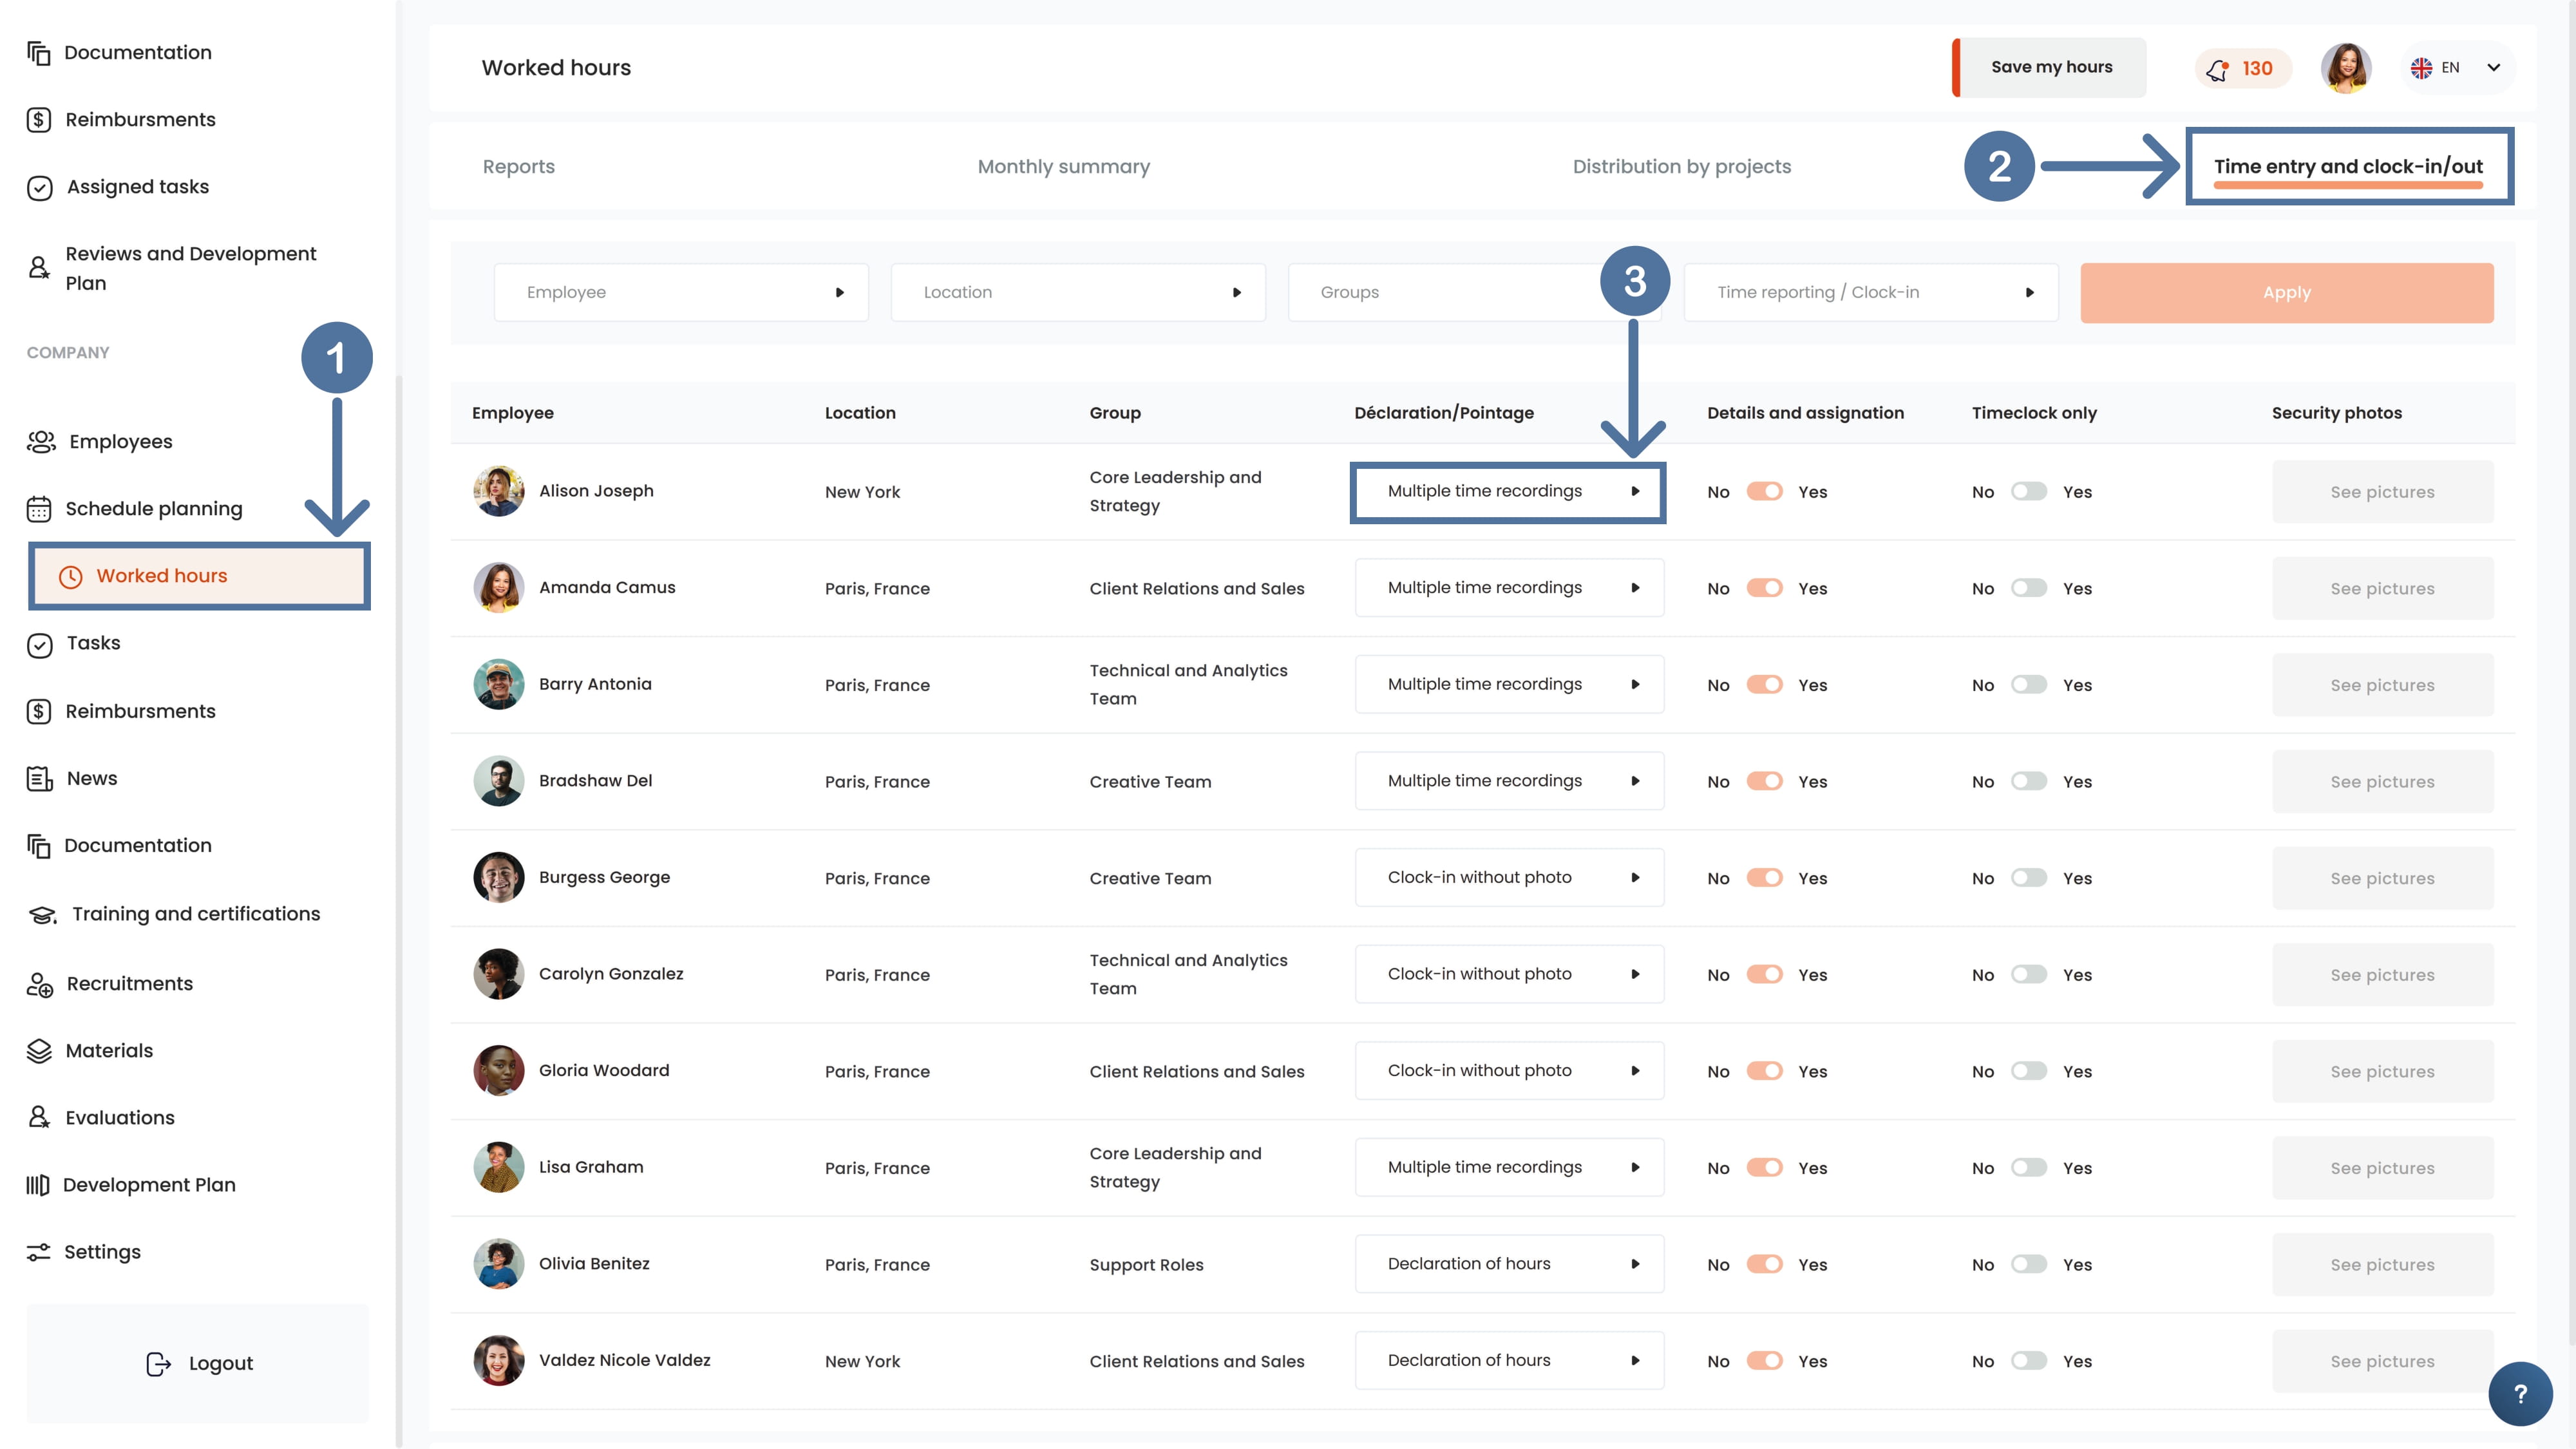
How to Set Up Work Hour Logging?
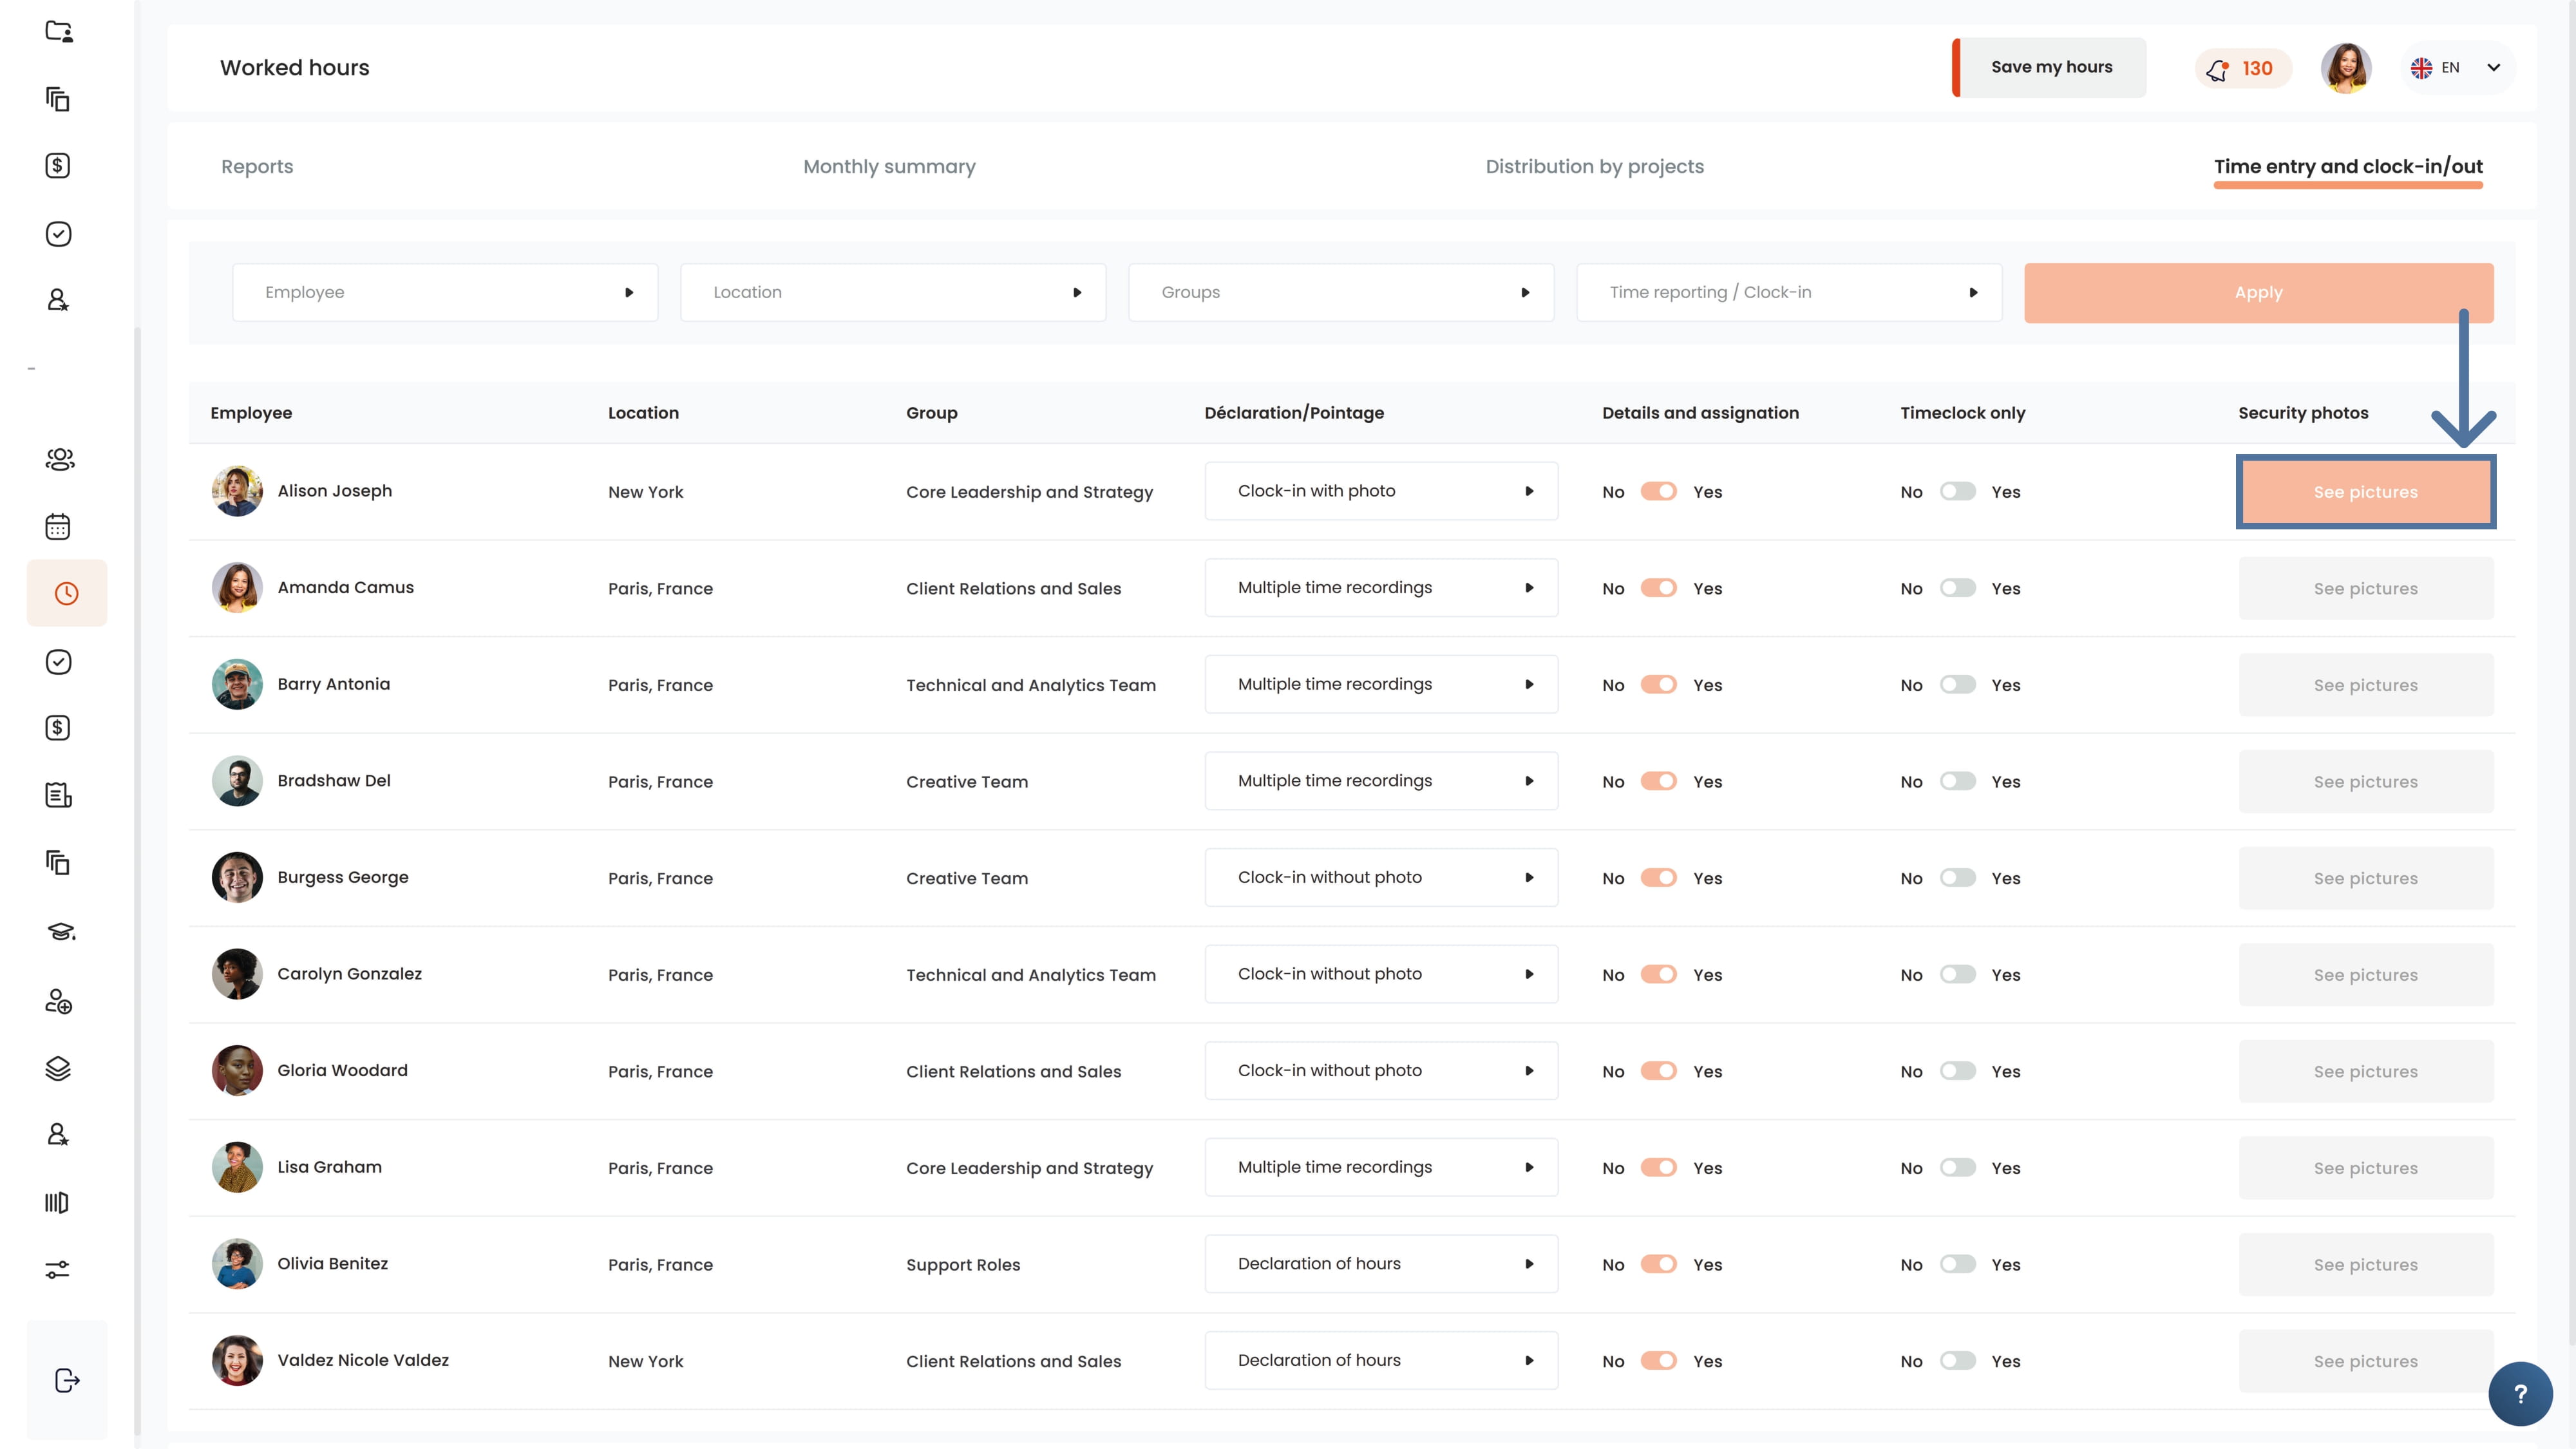
Go to the Worked Hours module, then to the Time entry and clock-in/out tab.
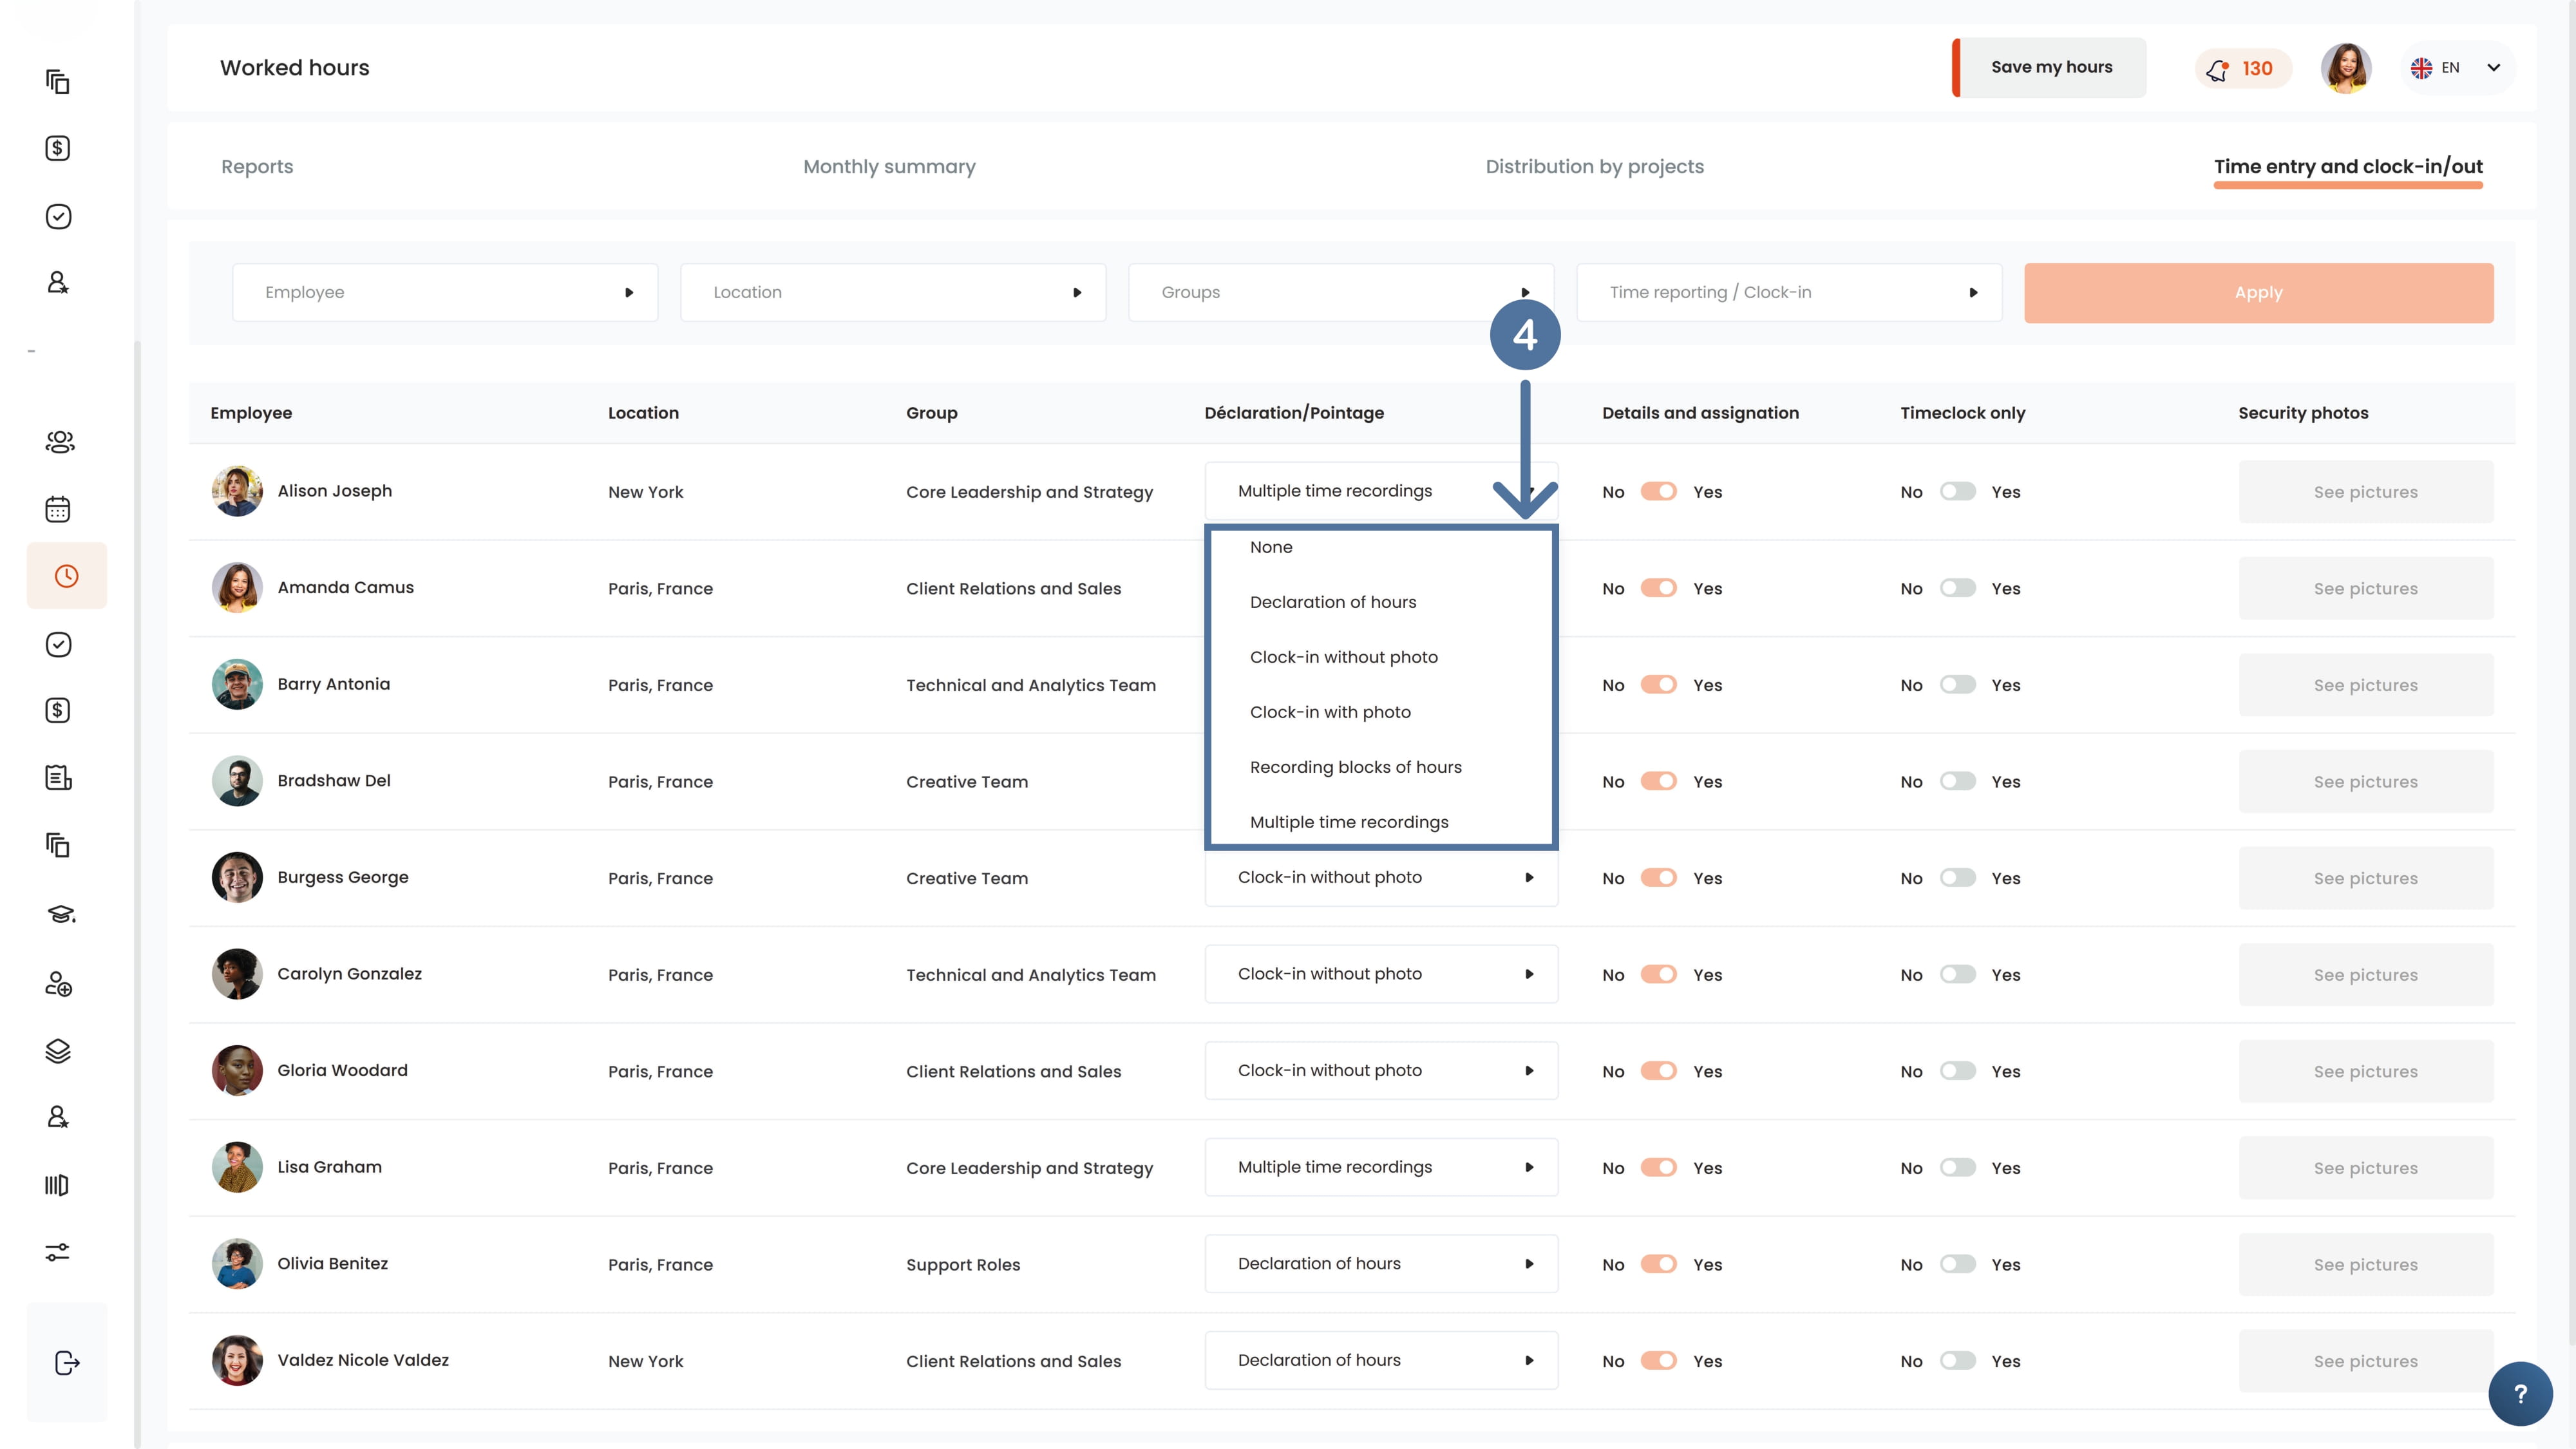
Next, select the type of hour logging for each employee by clicking on Declaration/Pointings.
Notes:
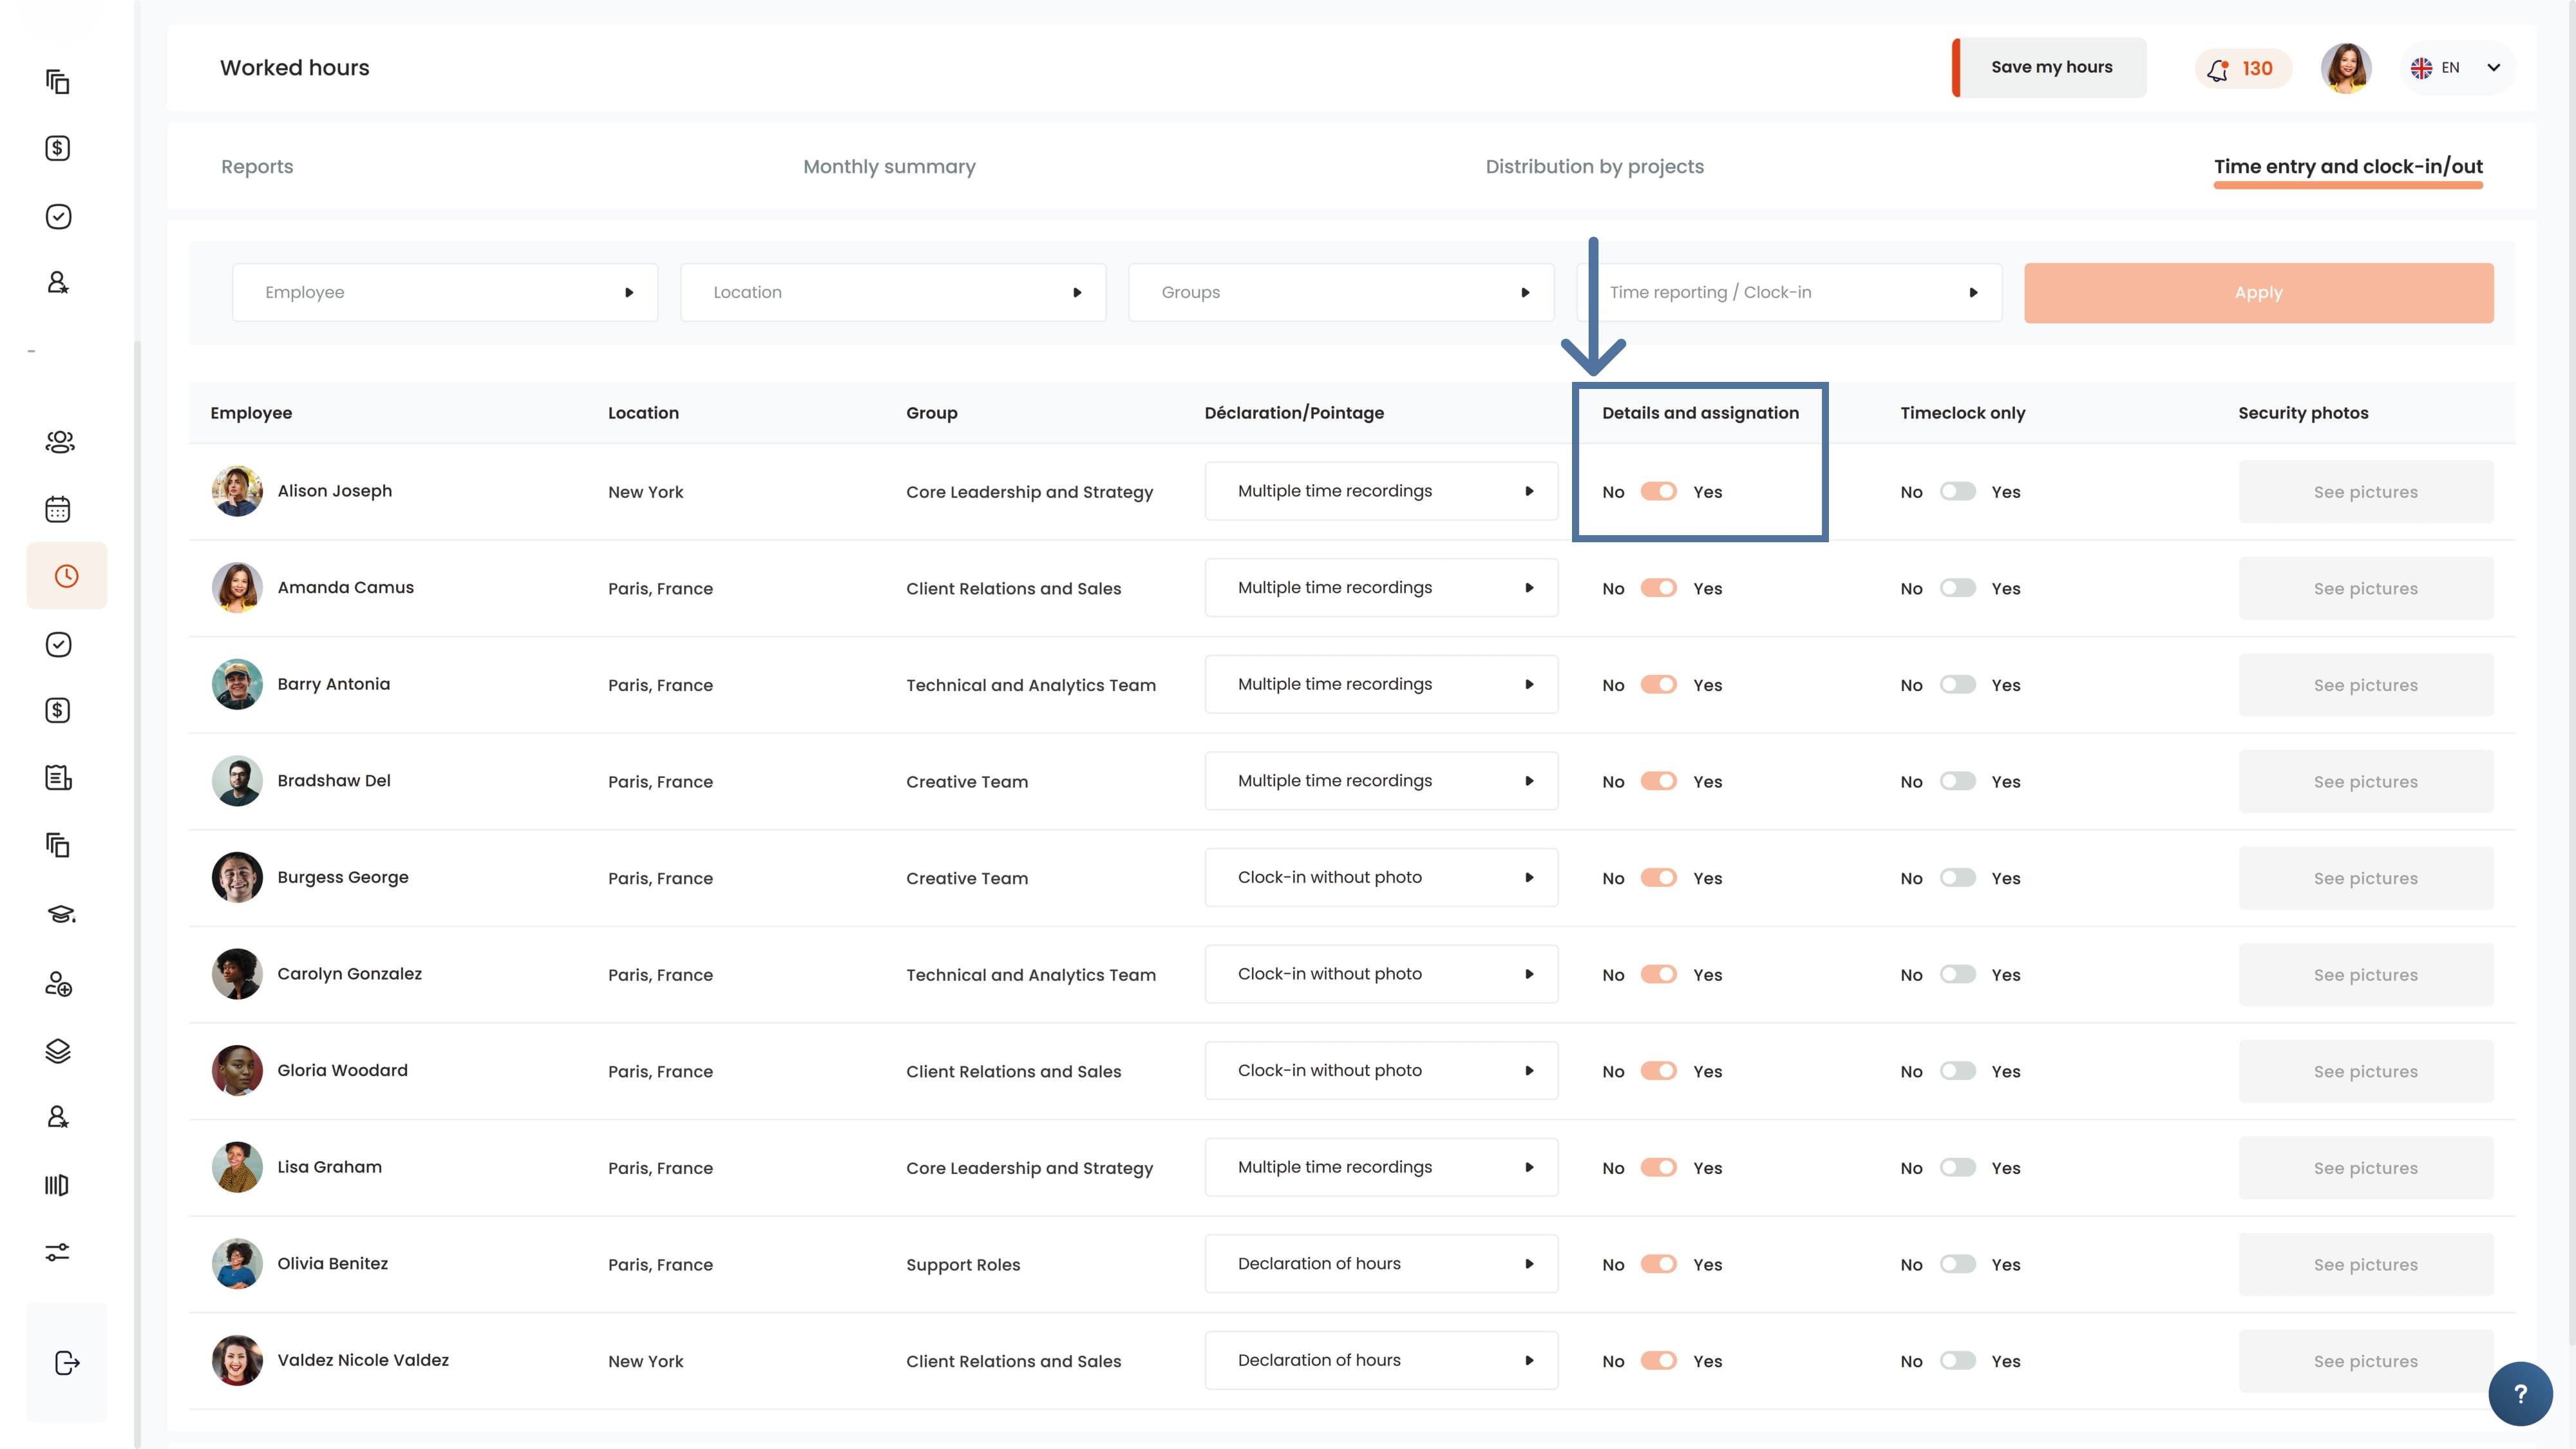
To make assignments and details visible in the time entry sheet, you must activate the Details and assignations button. This option allows employees to record detailed information about the tasks they have completed during the day.
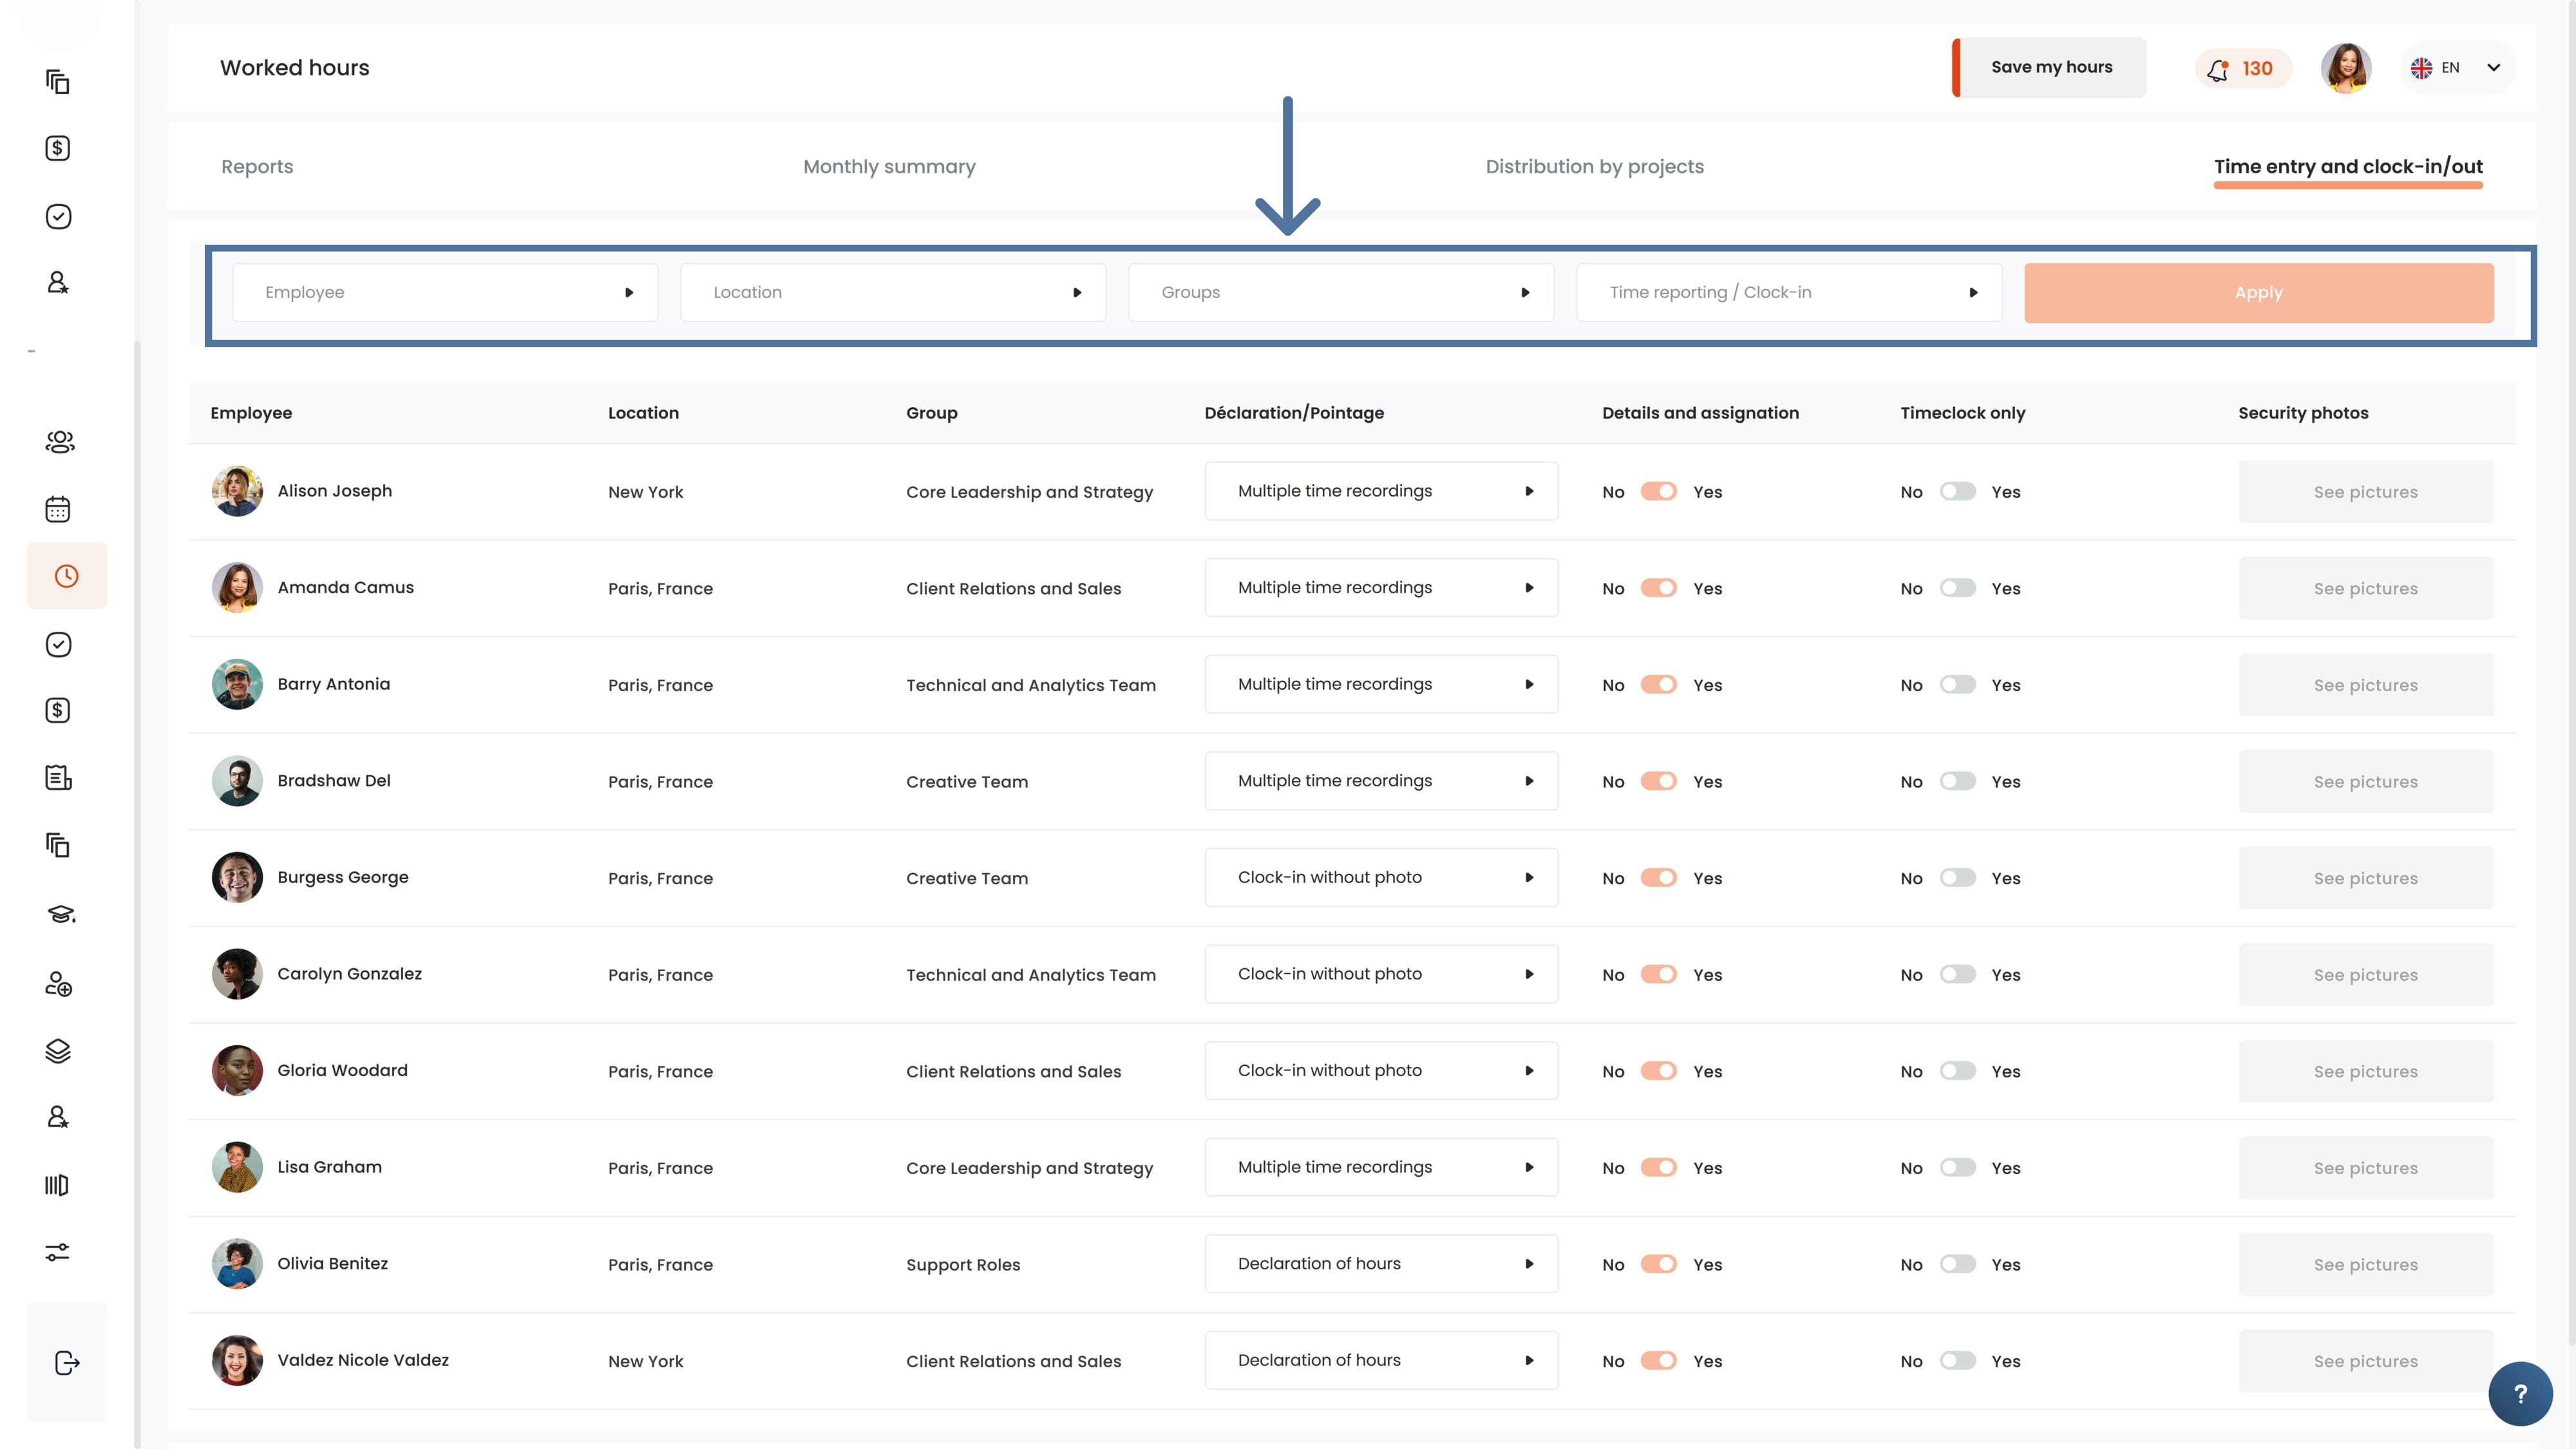
Use the search bar at the top to help sort the information you need.
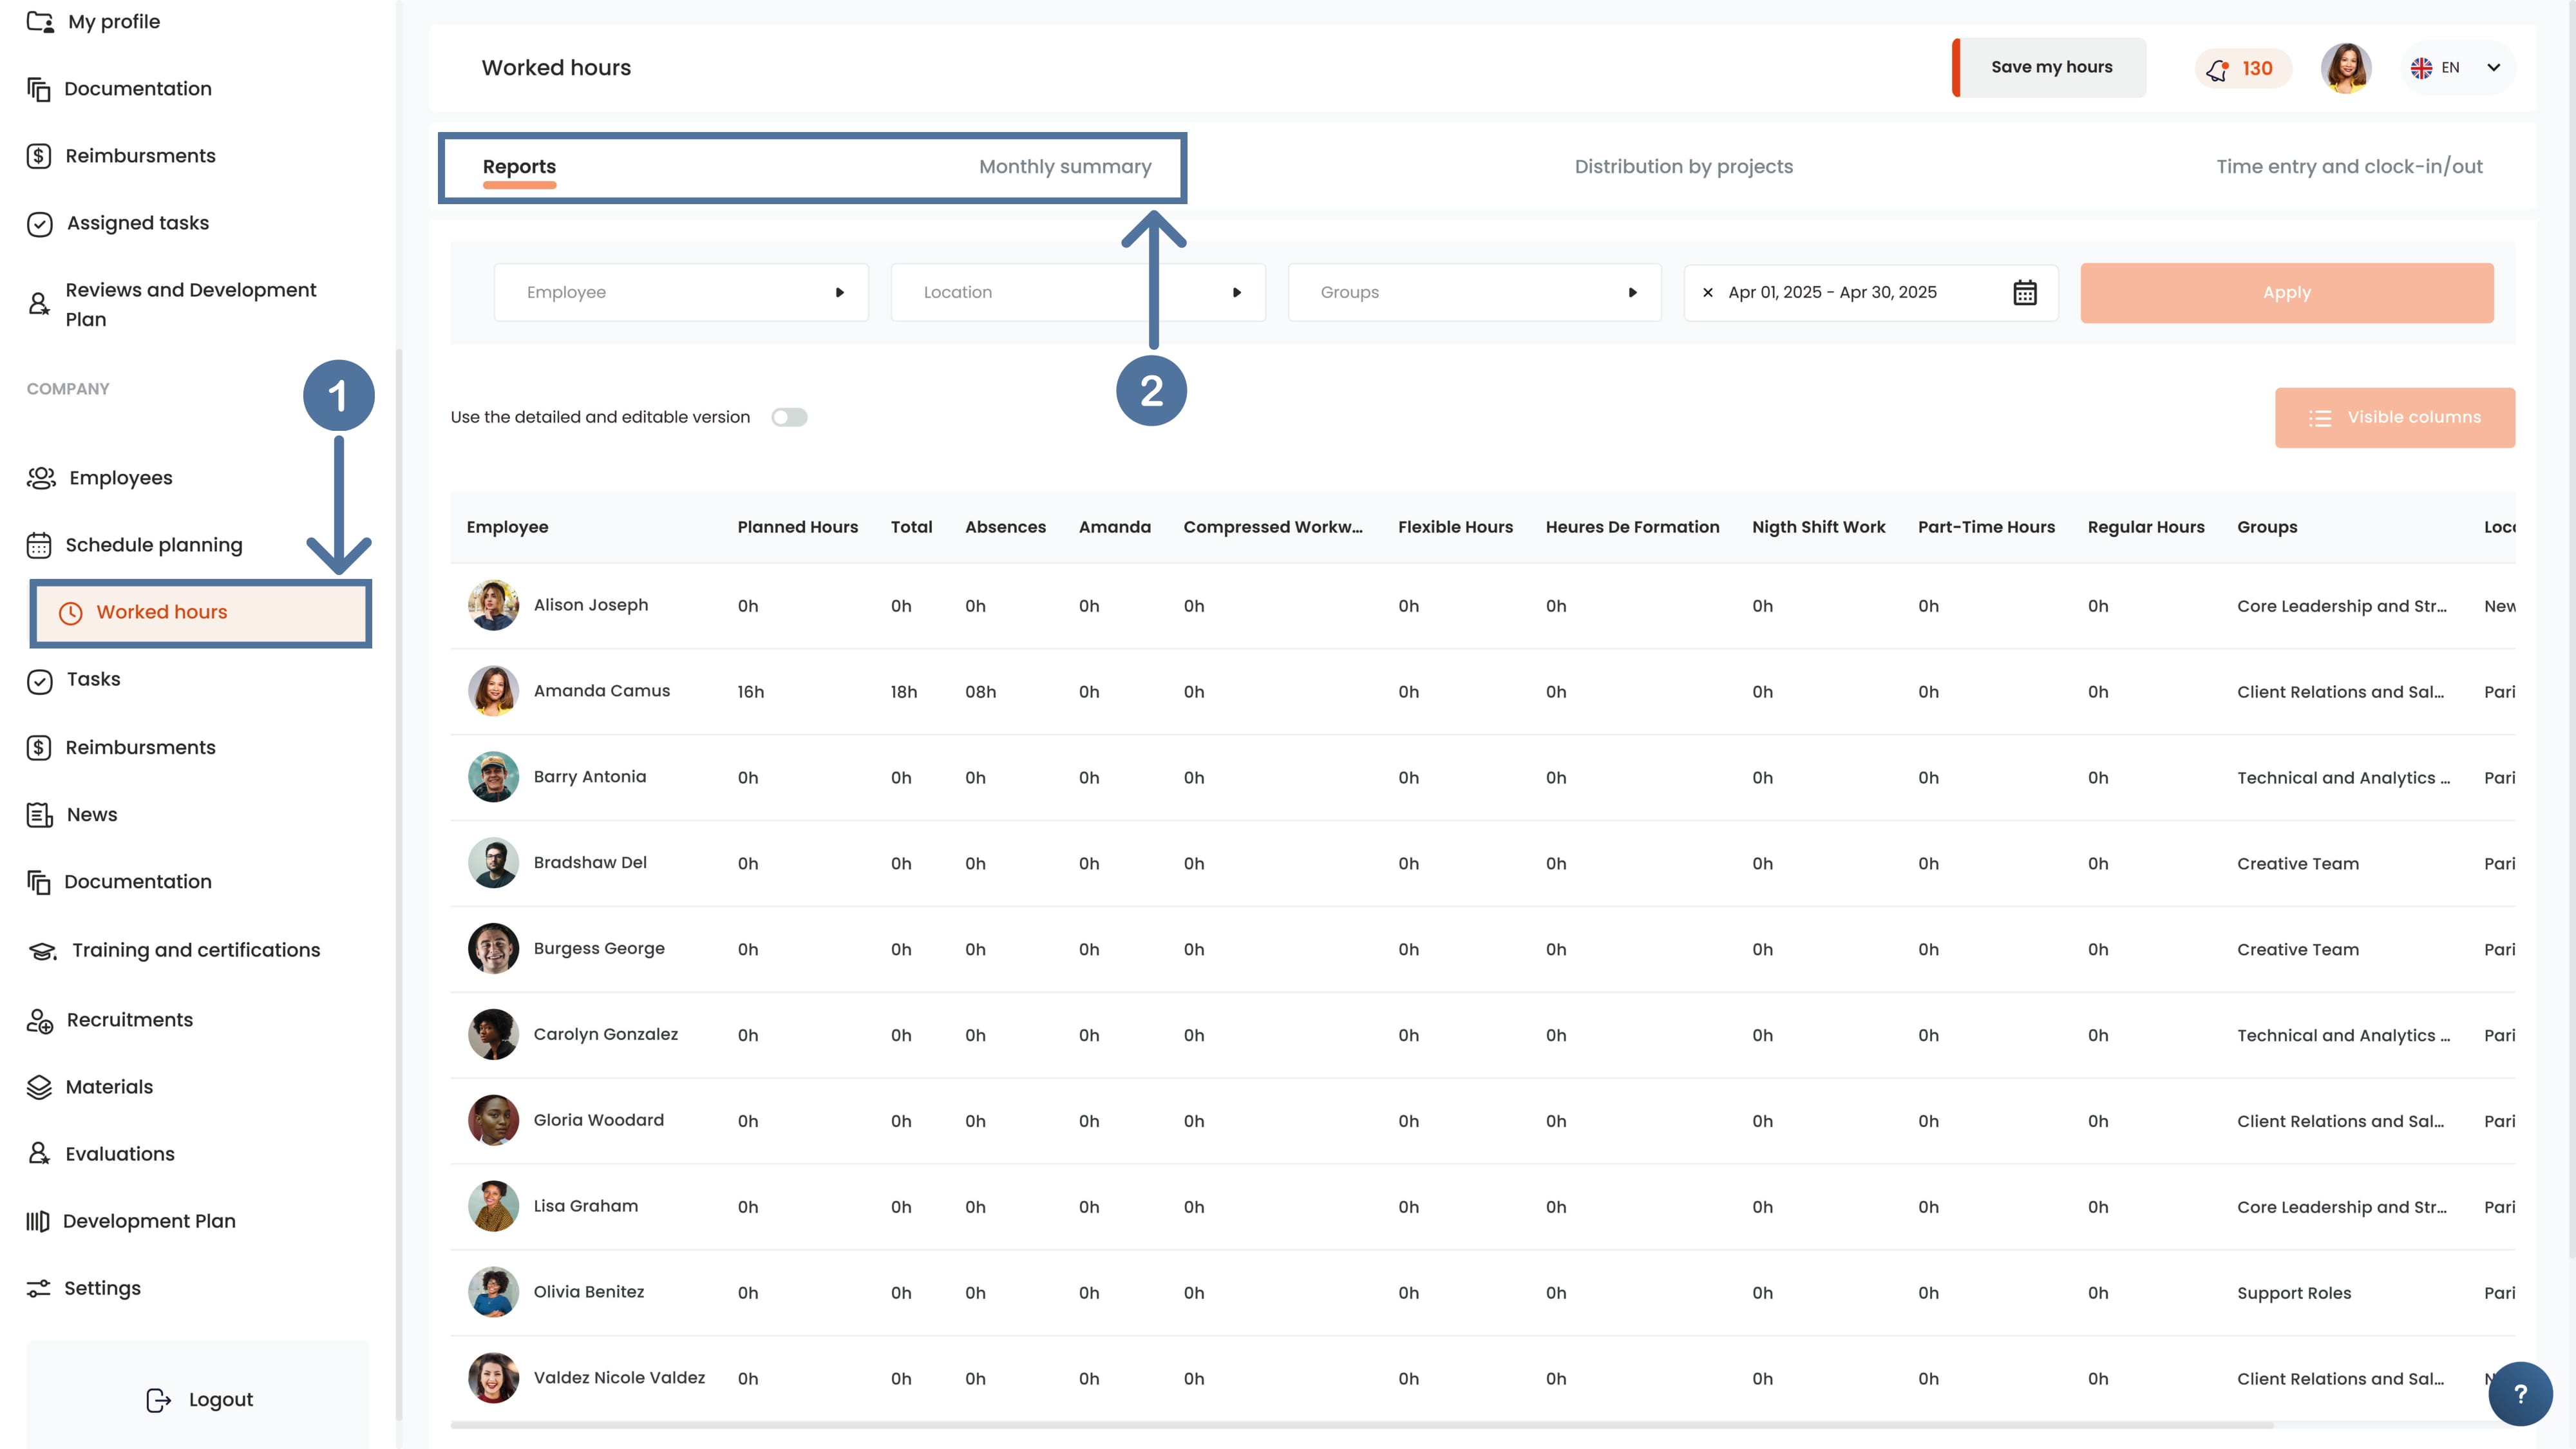
All recorded hours will be visible in the Worked Hours module under the Report or Monthly Summary tabs.
Options for Logging Worked Hours:
To configure how employees will log their worked hours, there are five options:
None: No button will appear to the right of the small notification bell if this option is selected. This area will remain empty.
Declaration of hours: Employees will log their hours themselves. If this option is selected, a Log My Hours button will appear to the right of the small notification bell. Employees simply need to click this button to log and enter their worked hours.
Clock-In without Photo: Employees must start the time clock when they begin work and stop it when they finish their day.
Clock-In with Photo: Employees’ devices will automatically take a photo when they start and stop their time clock.
Recording blocks of hours:This option allows employees to log work in time blocks ranging from 15 to 60 minutes or more.
Multiple time recording : This option allows employees to add multiple worked hours over a long period of time in a single entry.
Notes:
If you select Clock-In With Photo for an employee, ensure that their device has a front-facing camera; otherwise, the employee will not be able to activate their time clock.
If you choose Clock-In With Photo, all photos for the month for each employee will appear in the Monthly Photos column.
How to Add Hour Types?
You can create different hour types to facilitate the classification of your employees' worked hours.
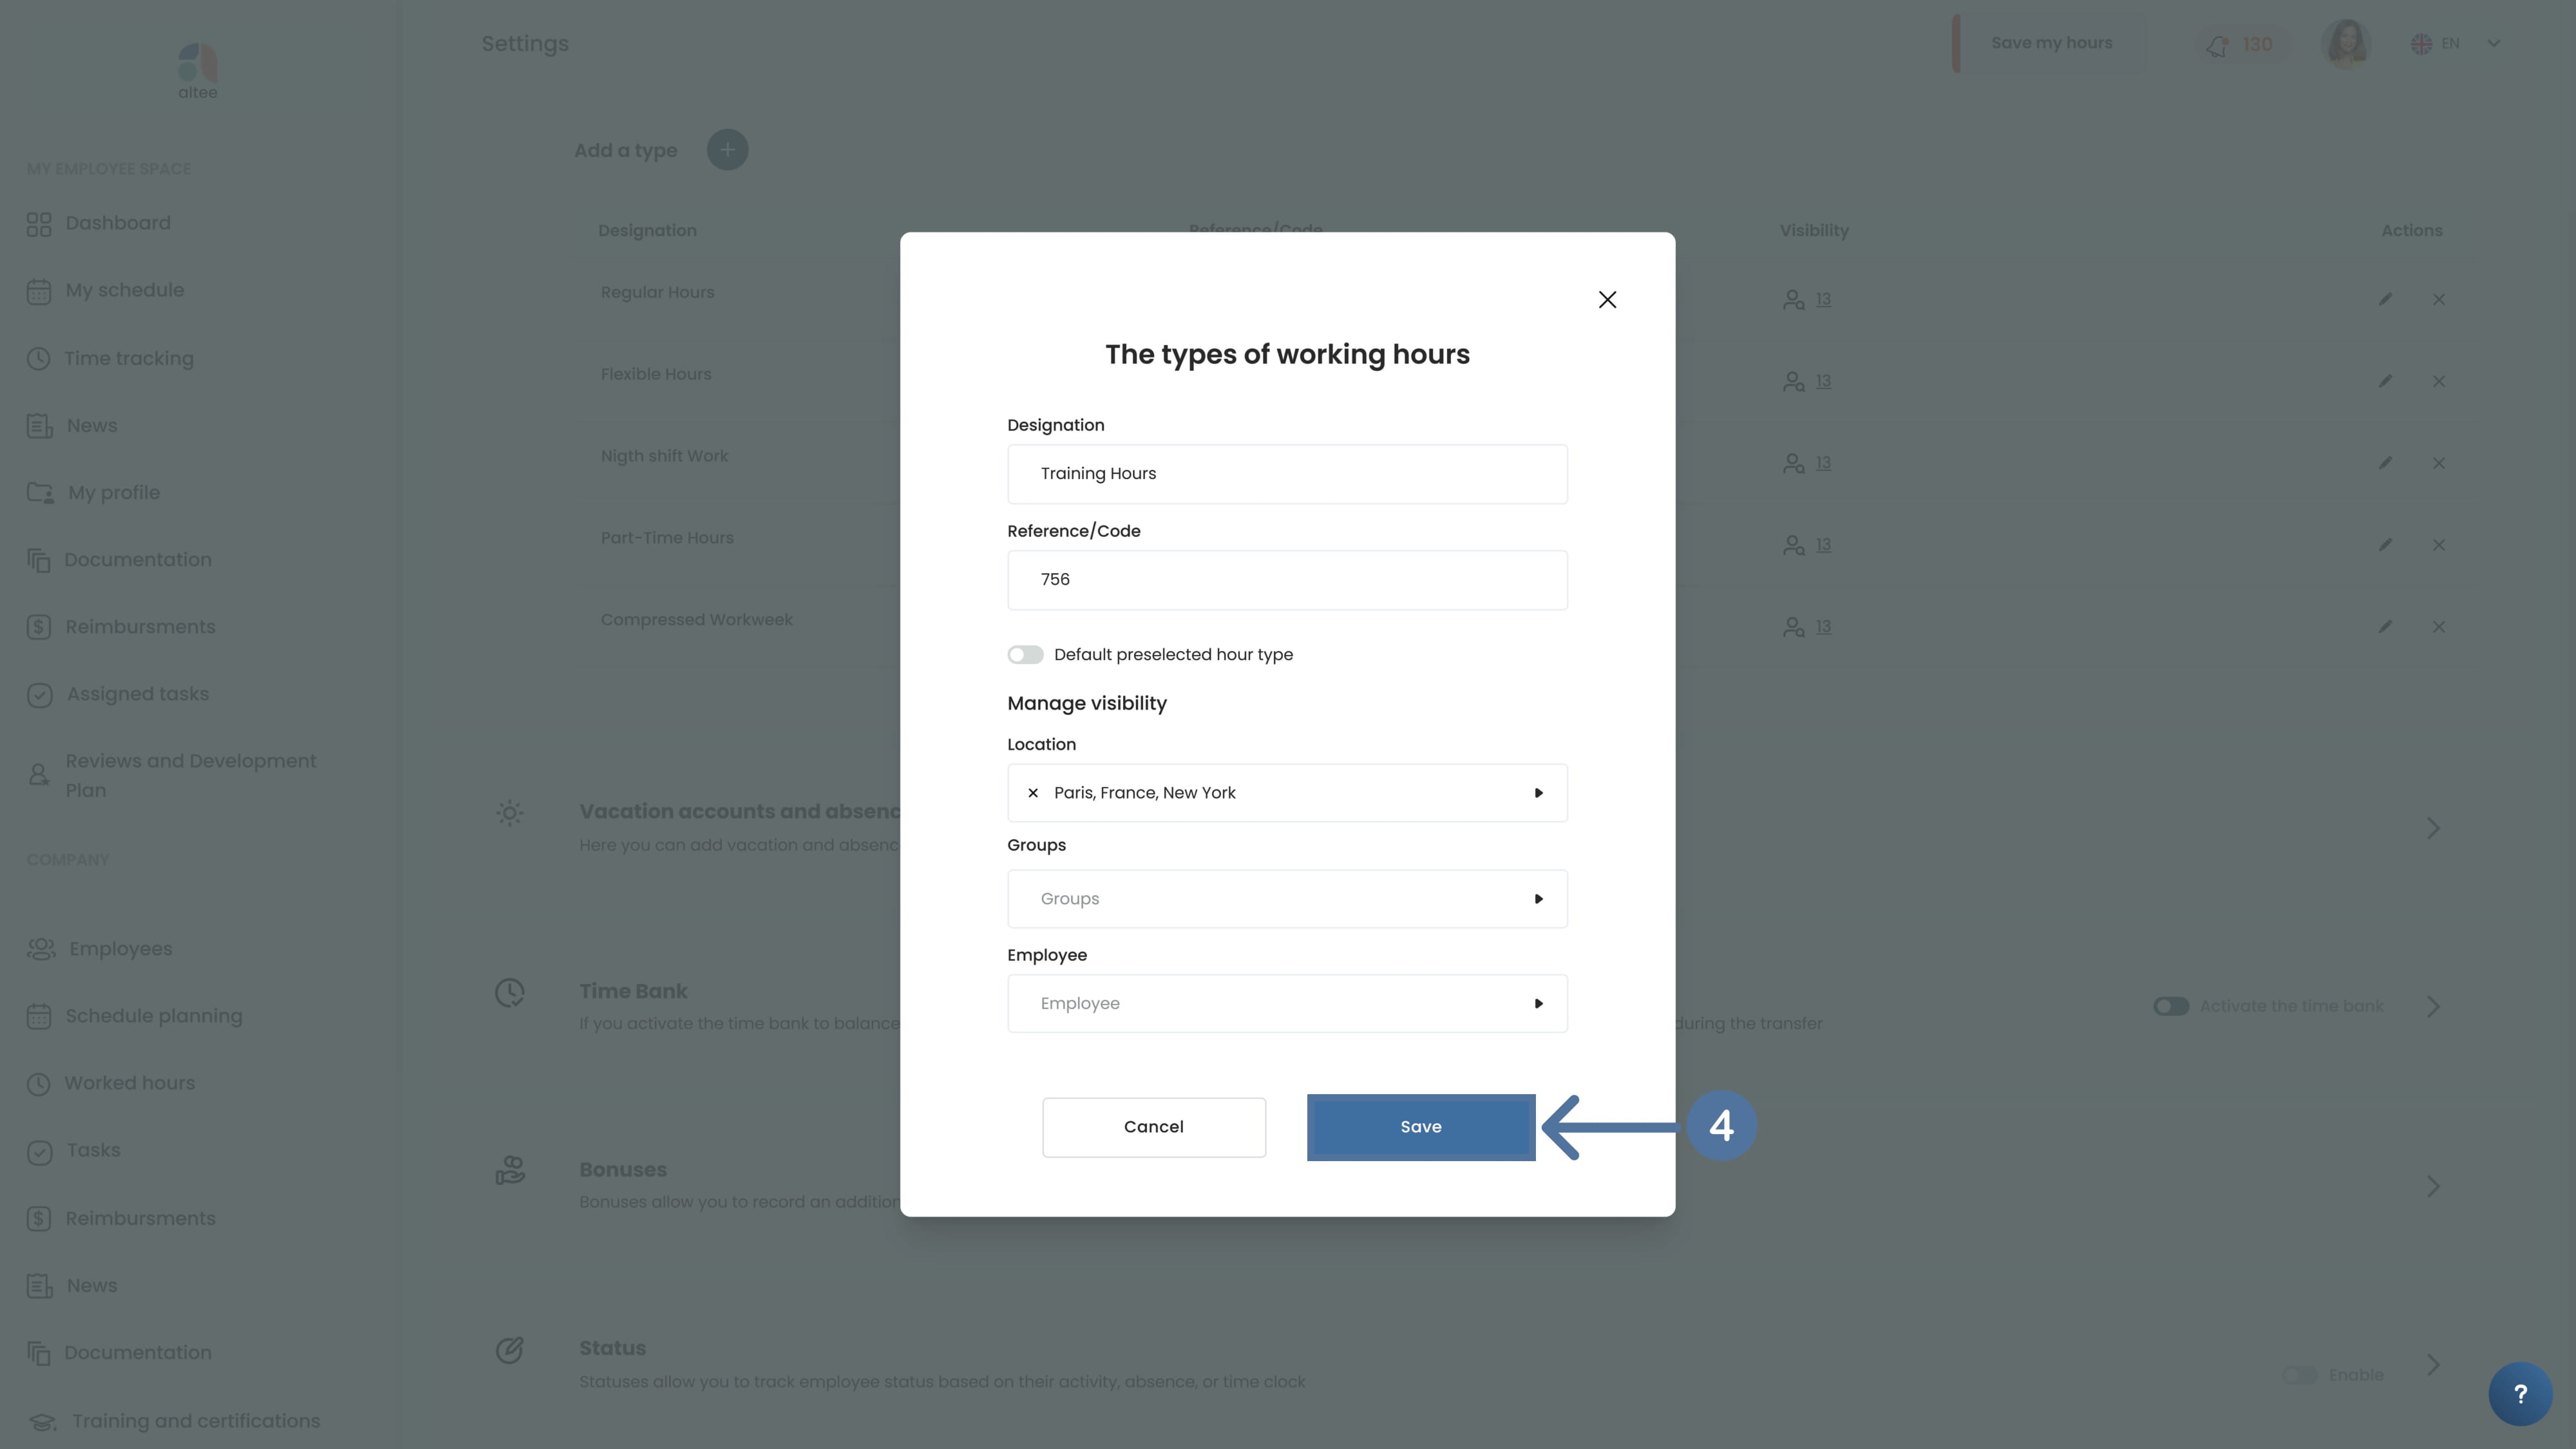
Go to the Settings module and click on the Worked Hours tab. Then, click on the Add a Type button.
Fill in the required information and click on Save.
You can manage the visiblity of the type of working hours in the : Manage visibility section. This way, when employees log their worked hours, they can select the hour type.
Notes:
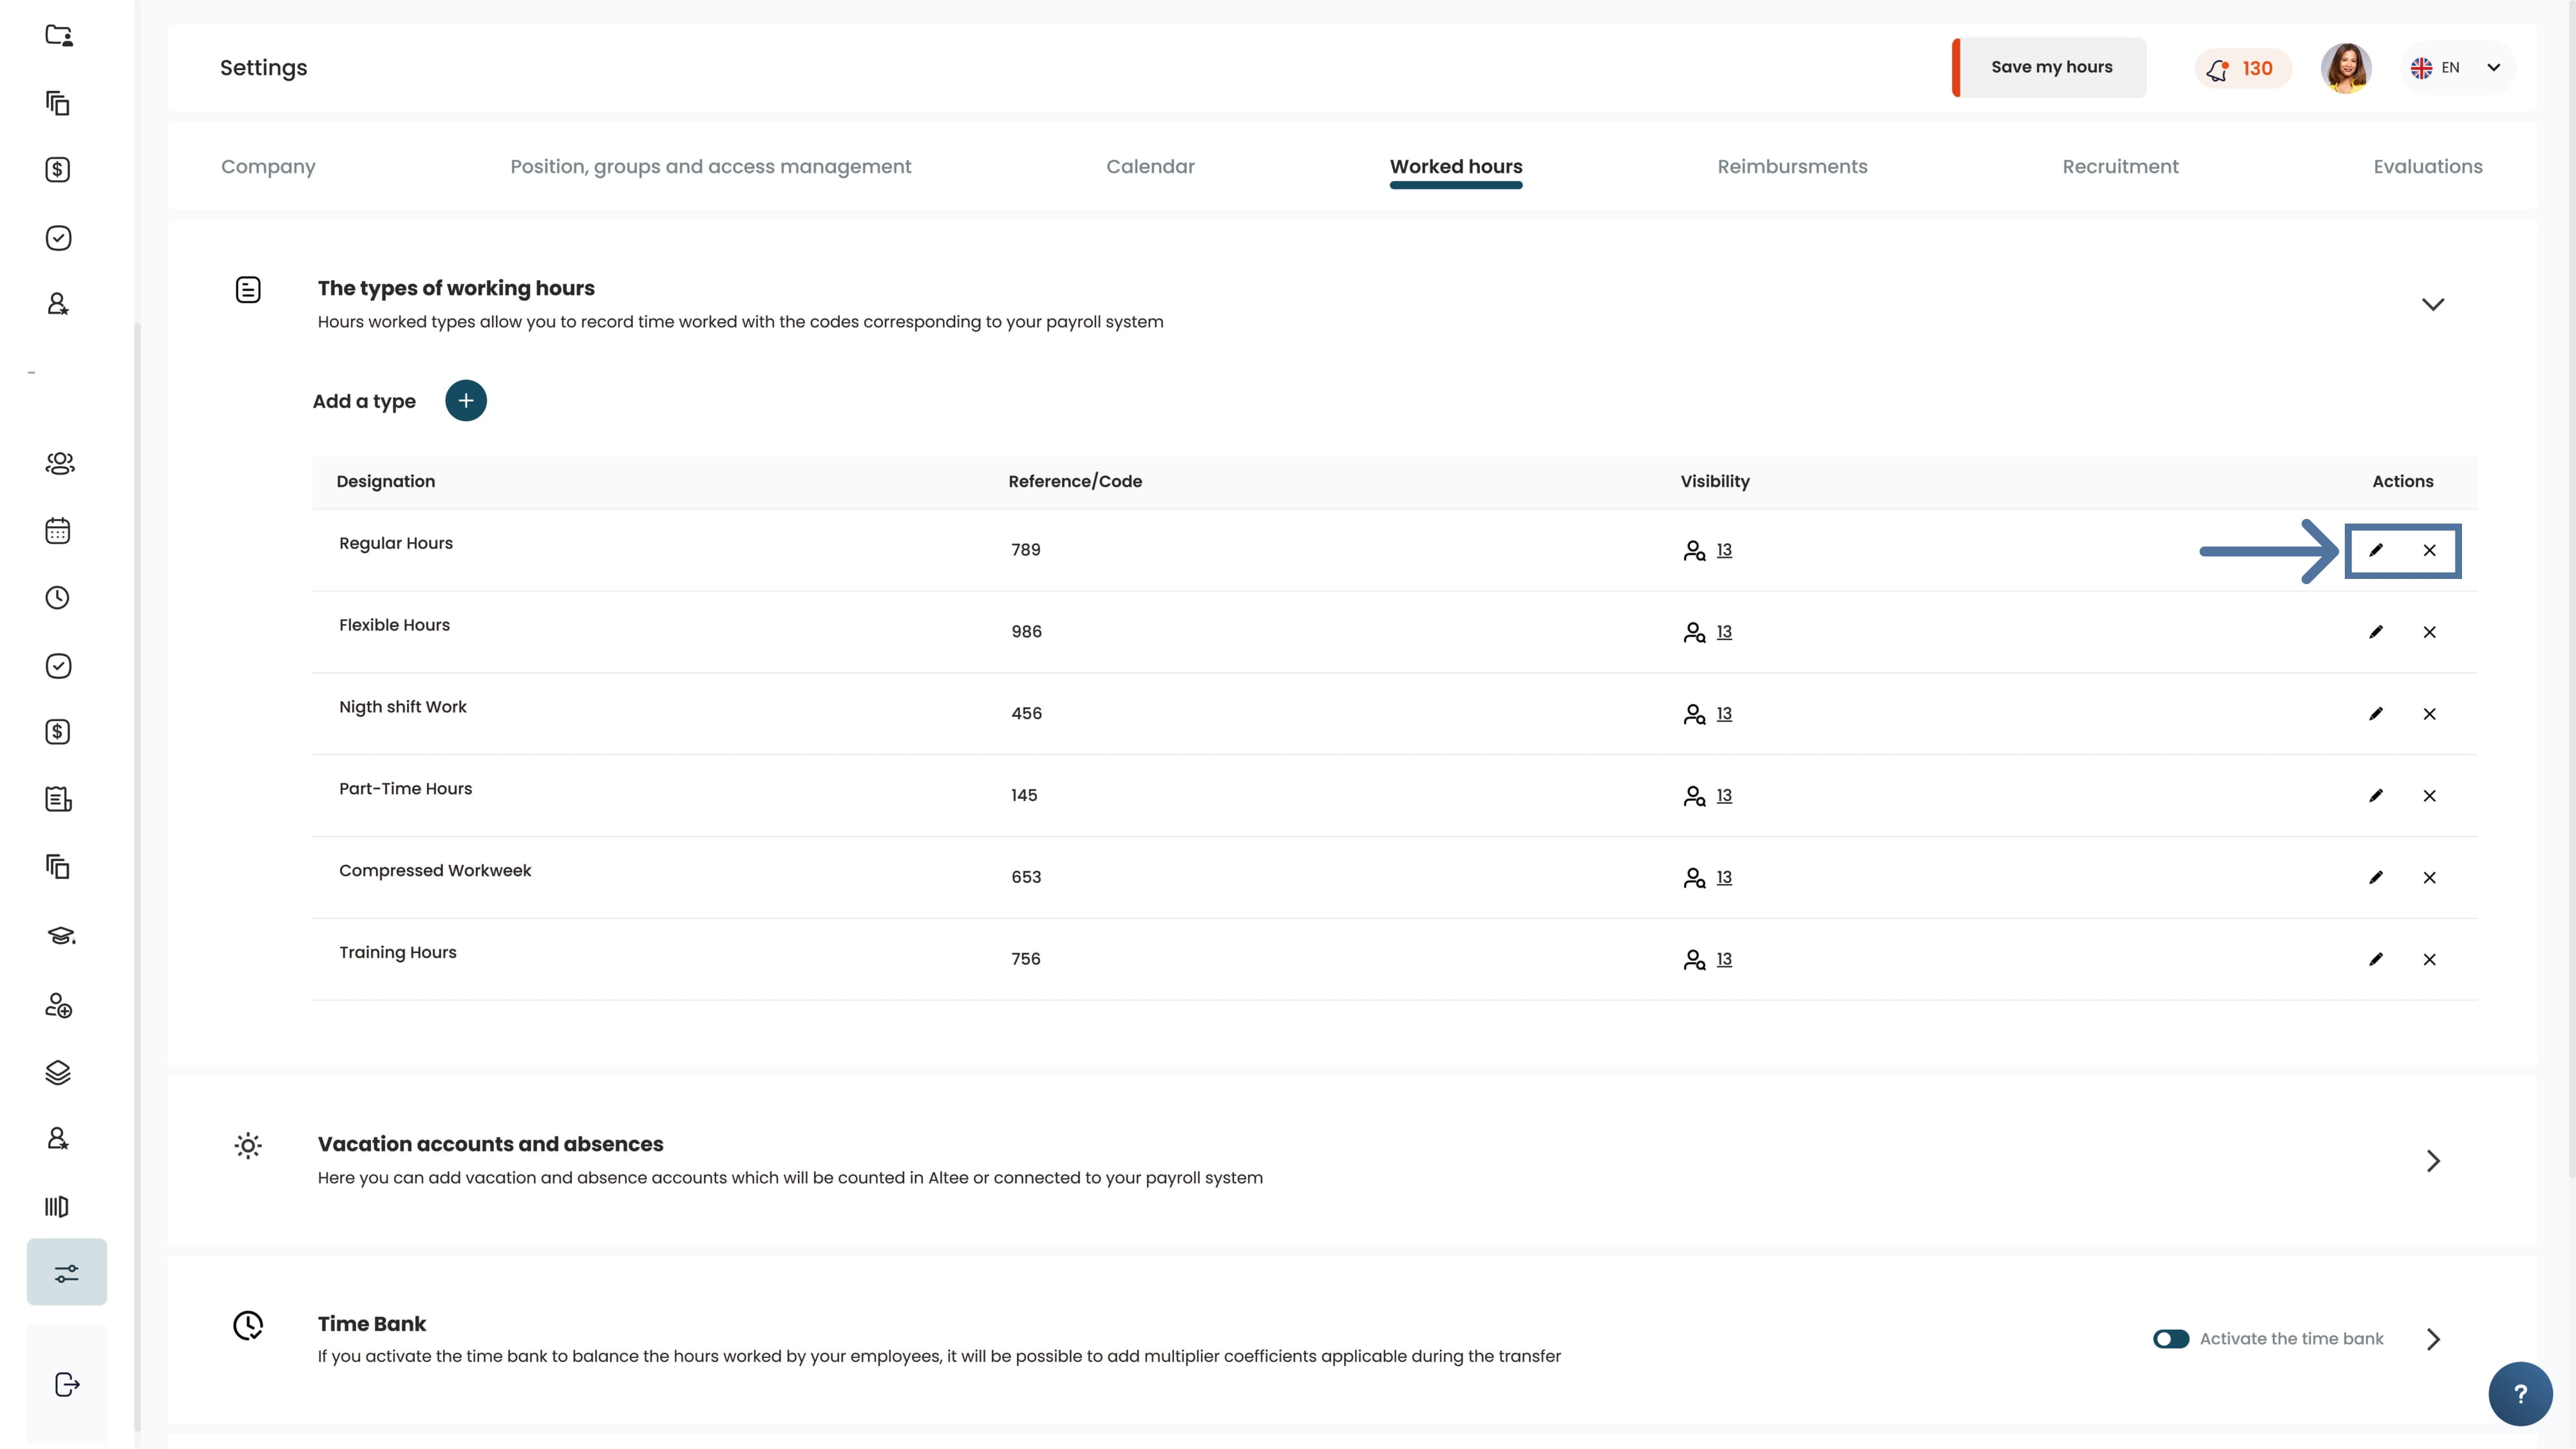
All added hour types will appear in the list at the bottom.
You can modify or delete these hour types by clicking on the buttons at the bottom of the Actions column.


.svg)

